Pottery Class Singapore
If you're looking to learn pottery Singapore, there's no better place than Singapore. Not only are the classes some of the best in the world, but you'll also get to learn from some of the most talented and experienced potters around. In this article, we'll introduce you to pottery class Singapore and what you can expect from them.
You can also check other Team Building Workshop Singapore for more amazing workshops!
What is Pottery Class Singapore?
Pottery making is one of the most beautiful and useful arts around. The ceramic making process dates back to humanity's earliest days, connecting us all to something basic and pure. Despite the fact that pottery creation has evolved over time, the basic ceramic class process remains unchanged: shaping clay into something beautiful and useful.
There are several cheap pottery class Singapore. The most popular include pottery wheel classes, which teach you how to create various forms and shapes using a potter's wheel. Pottery painting lessons may be found as well, where you can learn how to paint your own ceramics. There are also pottery studios in Singapore that provide classes for both novice and expert potters.
How to Make Pottery
1. Shaping
There are various approaches to transform raw clay into pottery. Pinch pots are a simple craft for novices to make. They're precisely as they sound: clays formed into the shape of a bowl, pot, or dish that have been pinched together. They're usually no larger than the size of your palm and are ideal for gaining a sense of what it's like to work with clay.
2. Pottery Wheel
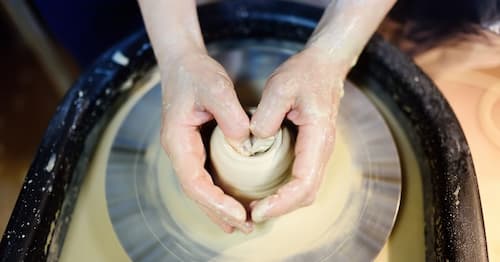
With a pottery wheel, a vessel is constructed up using the coiling technique and then spun on the wheel before being smoothed with your hands or other instruments. By carefully drawing the clay to expand the size and form of the vessel, you may thin its walls.
3. Smoothing
Pottery may be smoothed in a variety of ways. In the most basic technique, a wet sponge is applied to the outside of the object while it spins on the wheel. The sponge is drawn up from top to bottom as it spins. This procedure is repeated several times until the required smoothness is achieved.
4. Drying
After you've finished shaping and smoothing your piece, it'll need to dry for a while before firing. Clay that isn't sufficiently dried before being fired in a kiln can erupt, causing hours of work to be lost. To avoid this, your work should be allowed to air-dry for at least seven days, until it's completely dry. It will be white and firm rather than damp and chilly.
5. Glazing
You may choose between a number of colorful glazes in a variety of finishes, from velvety matte to super-glossy, depending on the type of clay you've used. The glaze is a liquid made of finely-ground minerals that adhere to the surface of your piece. The minerals melt when heated to the required temperature and join with the clay, resulting in a fusion and final finish.
6. Firing
The firing of a pottery piece is the final phase in the ceramics workshop. This is where your item is heated to a sufficient temperature to solidify (or cure) both the clay and glaze. A kiln is an oven that's used to fire pottery.
Methods for Making a Pottery
1. Pinching pottery
With your thumbs, press into the middle of a ball of clay you've rolled in your hands and held in one, then use the other hand's thumb to push into the center for a hole. Your fingers may start pinching the clay wall repeatedly as you slowly and evenly rotate the ball around. Push your thumb on the inside of the wall and your fingers on the outside. Continue until you reach a desired thinness and evenness in the wall.
2. Coiling pottery
To begin, you'll need a flat or curved surface on which to lay down your slab (such as a bowl placed on a mat or board). The use of fabric beneath the clay helps prevent it from sticking to the bowl form. After the form is roughly shaped, coils of clay are laid over it and piled on top to increase its height and breadth. The coils are mixed together with a tool or your hands, after which they may be smoothed out.
3. Carving pottery
In this method, the shape is created from a piece of clay using cutting and scooping tools.
4. Using a potter's wheel
The wet ball of clay is placed steady on the wheel, a hole is cut in the middle, and the wall pinched between the fingers of both hands as they pinch it upward.
Additional Tip
When picking a pottery lesson, it's vital to pick one that is appropriate for your skill level. If you're a beginner, consider taking a pottery class with no prior experience required. You may learn how to make a hand-built item out of slabs or coils in this type of class. If you're a seasoned potter, take a more advanced pottery class and make even more complicated containers like cups, bowls, and vases freely on the wheel.
Pottery Class Singapore
Taking couple pottery classes can be a fun and rewarding experience, whether you're a beginner or more experienced potter. In this guide, we've outlined the basic steps of clay making workshop, as well as some methods that are used to create different shapes. We encourage you to experiment with these techniques to find what works best for you and produces the results that suit your preference.
You can also check other Team Building Workshop Singapore for more amazing workshops!
If you enjoyed reading this article, you might also like:
